FREE UK DELIVERY ON ALL ORDERS
3 Costly Myths About Car Headlight Restoration

3 Costly Myths About Car Headlight Restoration

In this article you will learn:


  • 3 common misconceptions that cause people to overspend on headlight restoration and maintenance

  • The best and most inexpensive way to restore foggy headlight lenses

  • Which tools you do and don’t need for car headlight restoration

  • How to restore headlights at home

Most of us don’t think twice about our car’s headlights. But after putting years of wear and tear on your vehicle, you may turn on your headlights and wonder, “Are they getting dimmer?”

Your car is constantly exposed to the sun, rain, car exhaust and all sorts of dirt and debris. These environmental factors can degrade the plastic of your vehicle’s headlight lenses, causing them to slowly but surely yellow and oxidise. This can make it quite difficult to see on the road at night, and even poses a potential safety hazard.

Many drivers will simply replace their car headlights when they reach this condition, but, once you factor in the cost of parts and labour, it all adds up to one whopping maintenance bill. You may not want to drop several hundred pounds to replace those murky lens covers, and, the truth is, you don’t have to. More often than not, oxidised lenses can actually be restored at home, and it’s a lot easier than it sounds!

Here are three common myths about headlight restoration–and three reasons you should think twice before tossing those old lens covers in the bin.

Myth #1: You need a drill to restore your headlights

It is true that some headlight restoration kits recommend or require a sanding drill, but you don’t need one to get the job done.

A sanding drill is a handheld machine that allows you to quickly buff away the oxidised plastic from your headlight lenses to reveal the clear, transparent layer underneath. They make restoring your headlights a lot faster and more convenient, but, like a machine polisher for waxing or polishing your car’s paint, they’re just an optional tool.

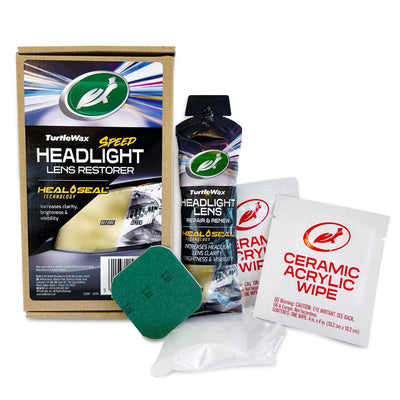
Many people believe that without this equipment, they won’t be able to restore their headlights at home, but, with a little elbow grease, you can just as quickly buff away oxidation by hand. Plus, there are plenty of affordable kits out there, like our Turtle Wax Speed Lens Restorer Kit, that don’t require a drill and are perfect for beginners!

headlight

Myth #2: If you restore your headlights, they’ll get foggy again in a couple of months

Some car owners think that even if they restore their headlights, and they look great now, in a couple of weeks or months, they’ll just become dull and cloudy again. Why bother wasting £10-20 when you’ll just need to replace your headlights anyway?

It’s true that, if you only buff away the oxidised layer of your lenses, it’s only a matter of time before they start to yellow and grow foggy. Minerals left on your lenses from the occasional downpour, combined with prolonged exposure to harsh UV rays, is the perfect recipe for oxidation.

Luckily, with a restoration done right, this isn’t the case.

Any good headlight restoration kit comes with a lens sealant: a clear, protective coating designed to create a durable barrier between your headlights and the outside world. This sealant creates a time capsule effect, preventing wear and tear to your freshly restored lenses to keep them looking pristine and crystal-clear for months–or even years–down the road.

foggy headlight

Myth #3: You should always start with the most aggressive compound when restoring your lenses

Ok, so let’s say that you decide to save a couple hundred pounds and do it yourself.  

You might think you can save time restoring your headlights by using the most aggressive rubbing compound to get rid of oxidation as quickly as possible, but this is actually one of the most common (and costly) mistakes you can make.  

Picking up the heaviest grit compound or sanding pad in a kit can strip away more of the headlight lens than necessary, cutting deep into the plastic and creating rough abrasions that can be difficult to smooth. There’s only so much plastic in your headlight lens cover; sand it down too low, and you may have to replace it altogether–costing you the price of a lens kit and a repair bill.  

Instead, you should always start with the least aggressive compound in your kit and perform a spot check on a small section of one of your headlights. This will allow you to check the severity of the oxidation, as well as ensure that the compound is safe to use on your lenses.  

If the oxidation comes clean while using the gentlest product, great! Problem solved. If not, you can always switch to the second least aggressive compound or sanding pad in your lens restorer kit.  

polishing headlights

The bottom line

Restoring dull, yellowing headlights to like-new condition is something any car owner can do at home. All you need is some microfiber towels and a good lens restorer kit! Your lenses will last longer and you’ll save money at the auto shop.  

And chances are– with the amount of care you’ll put into them, your headlights will shine just as brightly as the day you first bought your car.  

WANT MORE TURTLE WAX?

Subscribe for your newsletter and the rewards will be in your inbox before you even get there

Latest

News, events and insights from Turtle Wax® worldwide

Offers

Exclusive offers and discounts on Turtle Wax® products

Rewards

Regular treats and surprises for all subscribers

Thanks! You should receive a confirmation email shortly.