
HOW TO DO A CAR AIR FILTER REPLACEMENT
The air filter of a car acts as a protective barrier between you and the dirt, dust and other impurities it catches, supplying a steady flow of clean air. Over time, the contaminants build up on the filter, and if they’re not regularly replaced, can cause odours to seep into your vehicle’s cabin. Follow these simple steps on how to change your car filter.
REPLACING A CAR AIR FILTER
It’s recommended that you replace the car air filter every 20,000 km or once a year. You’ll need to know your car’s year, make, model, and mileage before selecting the right air filter, and it also helps to keep a record of when you replace it, so you know when it’s time to change it again. Keep reading to learn how to change a car's air filter.
STEP 1: LOCATE THE AIR FILTER
- Look for a rectangular or square shaped black plastic casing or housing, which holds the air filter. There will be a big intake hose connected to it. Check your vehicle’s manual if you’re unsure where to locate it.
- Wipe off any debris around the casing, then unclamp the housing cover or use a screwdriver if it’s held down by screws.

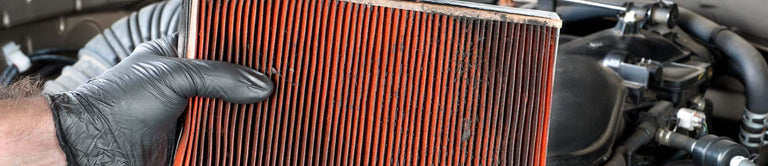
STEP 2: REMOVE THE OLD FILTER & INSTALL THE NEW FILTER
- After removing the housing cover, the air filter should lift right out. Use a clean cloth to clear debris, dirt and dust out of the housing unit.
- Inspect the housing unit and intake hose for any cracks or damage. You can move on to the next step if no damage is found.
- Place the new filter into the housing unit.
- Set the housing cover back onto the housing unit.
- Refasten the housing cover with the clamps or screws you originally removed.

REPLACING A CABIN AIR FILTER
Check your vehicle’s owner’s manual to verify if you have a cabin air filter, and where to locate it. Cabin air filters are typically located behind the glove compartment, under the dashboard, or under the bonnet. As with the air filter, it always helps to record when it gets replaced, so you can know when it needs to be changed again.
STEP 1: OPEN THE GLOVE BOX TO GET TO THE CABIN AIR FILTER
- Open your glove box and empty it out.
- Locate the pin on the outside edge of the compartment, and slide it out to remove the limiting arm. You may need to use a screwdriver, depending on the model of your vehicle. Don’t lose the screw.
- Press on both sides of the glove box and squeeze, until the compartment lowers to expose what’s behind it.

STEP 2: REMOVE THE OLD CABIN FILTER & INSTALL THE NEW CABIN FILTER
- There will typically be a black faceplate over the filter compartment. Release the latches on either side and slide it out of the way.
- Remove the cabin air filter slowly and carefully, ensuring not to disperse any dust or dirt.
- Vacuum out the filter housing and inspect for any damage.
- Making sure the arrows on the new cabin air filter are facing the same direction as the old filter, slide the new filter into the filter housing.
- Once it’s seated correctly, replace the housing cover and secure the glove box back in place.
For ongoing issues with air conditioner odours, check out our How-To article, “How To Remove Air Conditioner Smells”.

Related Articles
Featured in this article


WANT MORE TURTLE WAX?
Subscribe for your newsletter and the rewards will be in your inbox before you even get there
Latest
News, events and insights from Turtle Wax® worldwide
Offers
Exclusive offers and discounts on Turtle Wax® products
Rewards
Regular treats and surprises for all subscribers