
HOW TO RESTORE HEADLIGHTS
Dull, yellowed headlight lenses are an eyesore on any vehicle, and worse yet, are potentially dangerous. We rely on headlights for night time driving visibility, as well as for rainy and foggy weather, and cloudy lenses can greatly reduce the ability to detect any approaching road hazards in these conditions. Luckily, investing in new headlight lenses isn’t necessary with our Headlight Lens Restore Kit, containing the tools needed to restore headlights to look bright and shiny again. Learn how to restore headlights with our restoration kit.
Included in the headlight lens restoration kit:
- Precision Polishing Pads
- Spray Lubricant
- Lens Clarifying Compound
- Base Coat & Lens Sealing Wipes
Follow our easy, step-by-step guide to find out just how simple it is to restore your plastic headlights, right at home!
WHAT CAUSES HEADLIGHTS TO GO CLOUDY/YELLOW?
- Glass headlights were commonly used in cars manufactured up until the early 90s, but most cars these days are made with polycarbonate plastic lenses for increased safety and lowered manufacturing costs.
- Everyday wear and tear eventually gives way to damage on the headlight lenses over time, causing the plastic surface to become permeable.
- UV rays penetrate the permeable surface, reducing the transparency and resulting in that undesirable yellowed, foggy appearance.

HOW TO RESTORE CLOUDY/FOGGY HEADLIGHTS
STEP 1: PREPARE THE HEADLIGHTS
- With our M.A.X.-Power Car Wash and clean water, begin by washing both the headlights and taillights, while paying attention to the way your lenses look while they are wet.
- It’s important to note that the Headlight Lens Restorer Kit will not fix any dullness or cracks that appear on the inside of your headlight. It’s designed only for the outer surface restoration. If your lenses look marginally clear when they’re wet, you’re ready to move on to the next step.

STEP 2: APPLY CLARIFYING COMPOUND
- Wait for the lens to dry, and with a soft cloth or microfibre towel, spread the Lens Clarifying Compound across the surface of the headlight.
- Apply the compound in a side-to-side manner for about two minutes, covering the entire surface of the lens.
- Allow the compound to dry and use a clean microfibre cloth to lightly polish the surface. You’re ready to apply the Lens Base Coat if the lens is no longer cloudy.

HOW TO RESTORE HEADLIGHTS WITH HEAVY OXIDATION
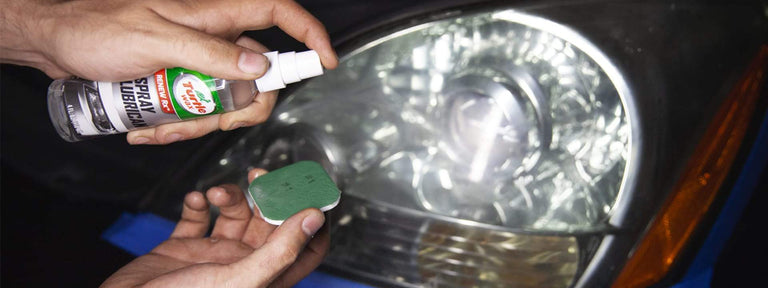
STEP 1: SPRAY LUBRICANT FOR POLISHING
- If you’re still seeing cloudiness on your lens after applying the Lens Clarifying Compound, you’ll need to continue with a few more steps.
- Apply the Spray Lubricant on both the green polishing pad and lens. Use a side-to-side motion to rub the lubricant across the lens until all traces of oxidation are gone. Make sure to keep the lens and polishing pad lubricated with the Spray Lubricant.
- Use the tan side of the polishing pad and rub side-to-side in the opposite direction for one minute. Again, keep the lens and polishing pad well-lubricated with the Spray Lubricant.

STEP 2: CONTINUE POLISHING THE LENS SURFACE
- Using the teal side of the second polishing pad, rub the lens from side-to-side in the opposite direction for about one minute.
- Flip over to the purple side, and continue to rub side-to-side in the reverse direction of the teal side, for about one minute.

STEP 3: DRY THE HEADLIGHT LENS
- Fully dry the lens with a microfibre towel or clean cloth.
- Apply the Lens Clarifying Compound and continue to rub until the lens clears up.
- Wait for the compound to dry to a haze, then polish with a clean cotton cloth.

STEP 4: SEALING THE BASE COAT
- After all previous steps have been completed, you are now ready to apply Lens Base Coat and Lens Sealing Wipe.
- To begin, swiftly spread a layer of the Lens Base Coat Wipe on both lenses.
- Promptly wipe your lenses with the Lens Sealant Wipe as soon as they are dry. This product adds a protective seal over your lenses to prevent any further yellowing that may occur in later time. The sealant takes 24 hours to cure, but your car can be driven during that time window.

SUMMARY
It’s easy to find various methods for cleaning your plastic headlight lenses, but our Headlight Lens Restorer Kit is specially formulated with oxidation and yellowing in mind, along with added protection to prevent further dulling and fogging. The restoring process can be customized based on the severity of your clouded lenses.

FREQUENTLY ASKED QUESTIONS
1. Will I need to use the entire kit if I only have a little bit of dullness on my headlights?
This condition is light headlight lens oxidation.
- Step 1: Clean your headlights and spread the Lens Clarifying Compound formula around using a soft cloth to remove surface oxidation.
- Step 2: Coat with the Lens Clarifying Compound and Headlight Sealing Wipe.
- Step 3: Allow the coating from the Headlight Sealing Wipes to cure overnight.
2. My headlights are especially cloudy and yellow. Will I be able to make them look like new again with the restoration kit?
This is what we call heavy oxidation. While our Headlight Lens Restorer Kit will vastly improve the appearance of your lenses by clearing up any yellowing or clouding, it may not be able to bring your lenses back to their original clarity if they’re heavy with imperfections or micro-cracks. However, the kit will still help to fill in any surface scrapes with the Headlight Sealing Wipes, which will help improve its clarity for increased visibility.
3. How long with the results last?
The results from our Headlight Lens Restorer Kit will last about four to six months, depending on the severity of the fogging and discoloration of your lenses. After that time, some yellowing may return, but it will be less noticeable and can easily be removed by the Lens Clarifying Compound.
4. Will the Headlight Lens Restorer Kit work on other plastics?
Yes. Other plastics the kit will work on are Plexiglass, clear plastic vinyl and other acrylic materials with a clear surface. It works the same way, removing scratches and other dulling effects. However, if you don’t notice any improvement after one restoration attempt, the plastic may be too soft for the kit. Discontinue use.
5. Can the kit be reused on more than one vehicle?
Yes. The restoration pads can be reused again and again, until the sanding pad surfaces are worn down and no longer effective.
6. How do I get rid of the scratches that are still visible?
- Step 1: If you still have unsightly scratches on your lens surface, use a soft terry cloth towel to apply the Lens Clarifying Compound.
- Step 2: Use firm pressure to rub the compound side-to-side for about one minute.
- Step 3: Buff the area after letting it dry. You may need to do two or three applications.
- Step 4: For heavier scratches, use pads #3 and #4 again with the Spray Lubricant. Follow by applying the Lens Clarifying Compound with a soft terry towel, one or two times.
Related Articles
Featured in this article


WANT MORE TURTLE WAX?
Subscribe for your newsletter and the rewards will be in your inbox before you even get there
Latest
News, events and insights from Turtle Wax® worldwide
Offers
Exclusive offers and discounts on Turtle Wax® products
Rewards
Regular treats and surprises for all subscribers