The Ultimate Orbital Car Polisher Guide
In this article you will learn:
If you love to detail your car, polish the paint to perfection and top it all off with a fresh coat of wax, then there’s no tool handier than a car polisher. This incredible, multitasking machine takes care of everything from restoring dull, oxidised paint to erasing scratches, swirls and paint transfer, to applying wax in a smoother, glossier layer than anything you lay down by hand. Plus, a car polisher does it all in just a fraction of the time it takes to do the job manually.
All-in-all, machine polishers are pretty cool. But, with so many polishers to choose from, you may be wondering which is right for you. In this guide, we’ll break it down for you so you can know what is the best car polisher for your detailing needs. Let’s get to it!

Orbital vs. rotary polishers
Without any prior knowledge of machine polishers, understanding the different types of polishers can be a bit tricky. Different polisher manufacturers call their products a number of different names. Some call them car buffers or buffing machines; others muddy the waters even further by incorporating their branding into the product title.Let’s simplify things. There are two major types of polishers to choose from: rotary and orbital.
The way rotary polishers work is pretty straightforward; you simply turn on the power, and the buffing pad spins around at high speed to polish or wax your car. This intensive, highly concentrated action makes a rotary polisher particularly effective for correcting scratches, oxidation and swirls in your car’s clear coat. But because they’re so intense, these polishers aren’t very user-friendly for beginners. Hold a rotary polisher in the same spot for too long, and you could generate enough heat and friction to burn and further damage your clear coat.
Orbital polishers, on the other hand, are a much safer choice for a first timer. This type of polisher not only spins the pad like a rotary buffer, but it also rotates the pad in an orbital pattern. It’s similar to the way the Earth rotates on its axis while orbiting around the sun. This dual action distributes the friction and intensity of the polisher across a much wider area of your car’s paint, making orbitals much safer for beginners and professional detailers alike. So, if you’re looking for a good entry-level polisher to get your feet wet, we highly recommend choosing an orbital!

Selecting an orbital polisher
Good news—many orbital polishers are affordable, highly effective and even preferable for DIY beginners! If you happen to make the mistake of pressing down too hard on paint with an entry-level orbital polisher, for instance, the motor would stall for a moment. This doesn’t exactly make orbital polishers foolproof, but they're a bit more forgiving than other buffers, which means they’re perfect for anyone who’s still learning how to use this type of machine to get the results they want.Then, there are pro-level, dual action polishers, the machines that a professional detailer prefers. A dual action polisher is a super-powerful, gear-driven orbital polisher that’s excellent for heavy-duty paint correction. But, without the expertise of a professional detailer, a novice could potentially burn the clear coat, so if you’re a beginner, we’d recommend sticking with the more affordable, user-friendly model.

Pairing pads and polishes
The pads and polishes you should use with your orbital polisher depend on which type of clear coat you’re working with and what kind of results you’re hoping to achieve!Different car manufacturers use different kinds of clear coat when they paint their vehicles, so you’ll get the best results by first determining whether your clear coat is soft, medium or hard. Next, you’ll need to assess the severity of the damage you’re trying to correct. These two factors combined will determine how aggressive your cutting pads and polishing compound should be. The more severe the damage and the harder the clear coat, the more cutting strength you’ll need.
Of course, a good rule of thumb is to start with the least aggressive foam pad and polish first and work your way up if you need more cutting strength to help the clear coat last as long as possible. After all, most of today’s clear coats are thinner than a sheet of paper, so always err on the side of caution.

Using an orbital polisher to correct your paint
Now that you know more about orbital polishers, here are some tips on how to use one to restore worn and weathered paintwork to a sleek, showroom finish!Always start by prepping the surface of your car before you polish. Wash and dry your entire vehicle and use a clay mitt to decontaminate the finish if needed.
Take a look at your car’s painted surfaces. Pay close attention to any areas that get exposed to the most daily wear and tear. If the clear coat looks scratched, hazy or discoloured, then it’s time for some paint correction.
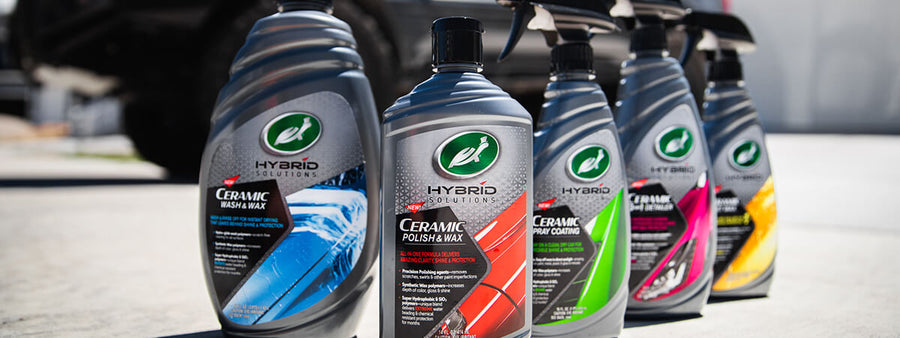
Attach a medium strength cutting pad to your orbital polisher. Then, apply 4 drops of your preferred car polish directly to the pad. If you're new to orbital polishers, we recommend our Hybrid Solutions Ceramic Polish & Wax. It’s a very user-friendly polish, perfect for anyone still learning the ropes. Plus, it comes with a built-in layer of ceramic wax to seal and protect that flawless finish.
Perform a spot-test on a small, inconspicuous area of your car. Using the lowest setting of your orbital polisher, apply the pad to the surface of your car and spread the product quickly across a 30 by 30 centimetre area. Then, amp up the strength to medium and polish the area once more. Be sure to only apply gentle pressure to the surface of the clear coat. The weight of the polisher alone may be enough to correct scratches and swirls.
Finally, use the lightest pressure to make a quick third, final pass over the area. Wipe away any excess polish with a microfiber cloth and examine the test spot. If you still see paint defects in the clear coat, switch to a more aggressive pad and repeat the above steps. If the area looks smooth and clear, carry on with your paint correction, polishing the rest of your vehicle in 60 x 60 cm sections.
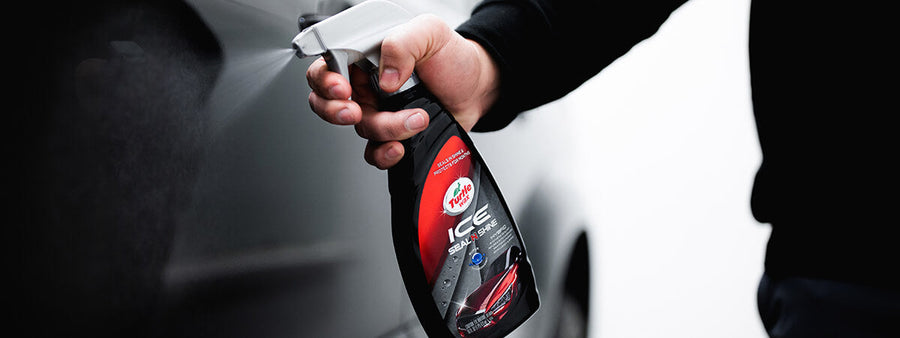
Last, but not least, once you’ve restored your car's beautiful paintwork to its original lustre, protect it with a layer of wax. Hybrid Solutions Ceramic Spray Coating or Hybrid Solutions PRO Flex Wax should do the trick nicely while enhancing that deep, eye-popping shine!
Pro Tip: Use your orbital polisher with a foam finishing pad to apply your wax to get the smoothest possible finish.