HOW TO POLISH A CAR AT HOME
In this article you will learn:
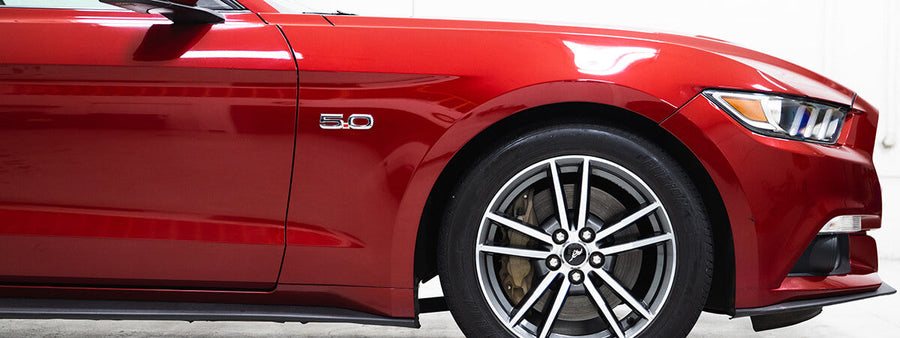
A smooth, picture-perfect paint surface on a car is desired by everyone. Alas, over time, small scratches by dirt and other contaminants begin to build up, making it increasingly difficult to maintain that mirror-finish. Even worse, unfortunate events can occur that cause deep scratches or discolouration on the paint surface. Luckily, scratches and scrapes can easily be corrected and your paint revived by using compounds. Find out how to polish a car using the compounding process, whether by hand or with a buffer, to achieve professional results right at home.

WHAT IS CAR COMPOUNDING?
- Compounding a car is the process of using compounding agents, like polishing, rubbing, or cutting, to restore damaged and uneven paintwork.
- Think of the compounds as being similar to liquid sandpaper, working to smooth & restore the clear coat layer.

POLISHING COMPOUND VS. RUBBING COMPOUND
- What is the difference between a rubbing compound and a polishing compound? There can be some confusion on how they differ from each other, and some people may be unsure of which one to choose.
- The polishing compound is less abrasive and usually used for minor scratches and imperfections, while leaving behind a beautiful shine. However, because it’s only for lighter defects, it’s not strong enough for correcting more extensive scratches and scrapes on the paintwork.
- Rubbing compound is the more aggressive formula, ideal for heavier and more extreme damage to the paintwork. The larger particles in the harder abrasives are able to smooth and restore the toughest defects.

WHEN SHOULD YOU USE A POLISHING COMPOUND?
A polishing compound is used to clean and restore the gleam of your car’s paintwork, as well as removing light imperfections. It can be used to:
- Remove light scratches
- Erase watermarks staining your paint and glass
- Remove stains or light oxidation from most vehicle finishes
- Treat minor imperfections on newer cars
Tip: Following up with a car polish or car wax after completing a compound process is important to not only protect the paint, but also to enhance the shine.

WHEN SHOULD YOU USE A RUBBING COMPOUND?
If your car has harsher and more extreme damage on its paint surface, it’s recommended that you use a rubbing compound. Examples of these defects include:
- Stubborn stains and severe oxidation
- Paint transfer from minor accidents (follow our guide on how to remove paint transfer here)
- Deep scratches and scrapes
Tip: A rubbing compound should never be used on a new car’s paint without first testing a less abrasive product first, like our Scratch Repair & Renew.

LIQUID VS. PASTE COMPOUNDS
- A finish with heavy discolouration from oxidising and paint transfer will benefit best from a paste rubbing compound. Even faded fibreglass finishes are ideal for this type of formula.
- A milder paste polishing compound or swirl remover may need to be used afterward, to aid in removing haze and enhancing the paint’s shine before moving on to wax.
- A liquid compound is even milder and easier to use than a paste compound.
HOW TO COMPOUND A CAR BY HAND
Our compounds have been formulated to be user-friendly and simple to apply by hand, keeping you from spending a lot of time on undertaking the restoration process, as well as saving you money by avoiding the auto shop.

STEP 1: ASSESS THE PAINTWORK
- If the paint surface has only minor scratches, oxidation, swirls, or watermark stains, our Polishing Compound, which is less abrasive, and will work wonders for these types of defects.
- Our Polishing Compound works wonders on minor defects, such as mild scratches, swirls, oxidised finish, or water stains. It’s a less abrasive cleaner.
- We recommend using our Rubbing Compound for areas affected by heavier damage and defects, such as scratches that reach deep into the paint layer, paint transfer, and severe oxidation.

STEP 2: WASH AND DRY THE CAR
- You’ll want to begin by thoroughly washing your car, using a product with concentrated cleaning properties, like our M.A,X-Power Car Wash, to keep the surface free from any dirt and debris before you start compounding.

STEP 3: TEST A SMALL UNNOTICEABLE AREA
- It’s recommended that you first test the compound on a small, hidden area on your car.
- This is to ensure that the compound product you choose isn’t too abrasive for the job you want to complete, especially if you are unfamiliar with the product.

STEP 4: APPLY THE COMPOUND
- Ensure the surface is cool to the touch and out of direct sunlight before you begin applying the compound.
- Apply the compound onto a moistened applicator pad, and work one small section at a time.
- Rub the compound in a steady even motion into the paint surface.

STEP 5: REMOVE EXCESS PRODUCT
- Remove the compound with a clean cotton or microfibre cloth before it dries, gently buffing the area.
- Inspect the newly compounded surface and if needed, reapply. Be careful not to use too much pressure, especially if the compound you’re using is a bit more abrasive.

STEP 6: RESTORE THE SHINE WITH CAR POLISH
- In order to successfully level the paint surface to remove scratches, shine gets lost in the process. Revive that beautiful shine by following up with a polish or wax. Keep reading to learn more on how to polish.
- For the best results on black paint, try using a pigmented polish formulated specially for black cars, like our Hybrid Black Polish.
HOW TO USE A COMPOUNDING BUFFER/POLISHER
For the tougher jobs, such as larger surface areas or a hard paint structure, you may benefit from using a dual-action (DA) polisher. First time users of this tool are advised to practice on an old vehicle, getting familiar to the feel and flow of the machine before tackling the job on your car.

STEP 1: CHOOSE THE RIGHT POLISHING/BUFFING PAD
- The extremity of the damage and scratches on your car can help determine which polishing/buffing pad is best.
- Your DA may have come with a bonus accessory kit with a variety of different pad sizes and grit levels.
- Selecting the right pad can make a difference in product performance delivery, between scratch removal (cutting) and finishing.

STEP 2: WORK ON A SMALL SURFACE AREA
- Work one small section at a time, about 50 cm x 50 cm.
- Apply our Clean Cut Rubbing Compound to the pad and spread the product onto the affected area without turning on the DA polisher.

STEP 3: SLOWLY TURN ON THE DA POLISHER
- Turn the DA polisher on slowly, and with slight pressure, very carefully move it in a side-to-side motion in the direction the metal flows. Set the speed to medium.

STEP 4: REPEAT
- Change direction, and repeat the same process, moving in an up-and-down motion instead.

STEP 5: REMOVE EXCESS PRODUCT
- Use a clean microfibre cloth to remove excess compound product and inspect the results.
- If necessary, you can repeat the process, but ensure you’re applying light pressure to the already treated area, because of the abrasiveness of the compound.
- If necessary, you can repeat the process, but because of the abrasiveness of the compound, ensure you’re using light pressure to the already treated area.
Tip: To avoid damaging the paint, keep the polishing pad moist with plenty of product during the application.

SUMMARY
Before attempting the process on your own, assess the extent of the damage prior to the restoration process. The more aggressive the formula, the more care will have to be taken to ensure the paint doesn’t take on additional damage. Always test the compound formula on a small, inconspicuous spot before moving on to larger surface areas.
Check out our other how-to guides in our Solutions section, for common car surface imperfections. Related articles are linked at the bottom of this article.
FREQUENTLY ASKED QUESTIONS
1. Why should a compound never be left to dry?
Compounds contain water and oils, the key to lubrication in their cleaning ingredients. Some compounds will harden like cement if left to dry out, making the task of removing them exceptionally difficult. Always use a moistened applicator or cloth to remove it as soon as possible.
2. Is it safe to use a rubbing compound for scratches my new car?
Rubbing compounds are far too abrasive for a new car’s paint finish. The only time a rubbing compound application can be attempted is if something less aggressive has already been tried first, like our Scratch Repair and Renew.
3. How do I repair deep scratches?
Our Scratch Repair and Renew is formulated for repairing damage and sealing scratches, without masking them.
4. When should I use a scratch and swirl remover?
Anytime you find scratches and blemishes on your car’s paint surface, Scratch Repair and Renew uses platelet technology and polishing agents to repair light to heavy scratches, leaving behind a protective clear coat resin. Finish up with a car wax and your car will be looking gorgeous and shiny again.